Can Your RV Solar Power System Handle Boondocking? What to Check Before You Go Off-Grid

Can Your RV Solar Power System Handle Boondocking? What to Check Before You Go Off-Grid

Boondocking is one of the most rewarding ways to travel in an RV. You get quiet campsites, open skies, and the satisfaction of being completely self-sufficient. Still, going off-grid means your RV has to supply all your power on its own. Your solar panels, batteries, and wiring become the backbone of your entire setup once you disconnect from shore power. A quick check before your trip can help you avoid dead batteries, slow charging, or unexpected power shortages that can cut your adventure short.

The moment you park in a remote spot, your electrical needs change. Everything you rely on runs from the same limited energy supply. Lights, a fridge, water pumps, fans, and chargers all draw from the power you produce during the day. When your equipment is clean, healthy, and configured correctly, boondocking feels simple and stress free. When it is not, the smallest issue can turn into a real inconvenience.

Why Solar Prep Makes a Difference Off-Grid

A reliable system is essential because your RV solar power system becomes your main source of electricity. Your panels must gather enough energy during the day to keep your batteries full, and your batteries must store that power until you need it. If either part of the system runs at less than full strength, you notice the effects quickly.

The U.S. Department of Energy notes that solar panels perform better when they are kept clean and free of debris. They also highlight the role shading plays in reducing output, which is why trimming nearby trees is recommended for homeowners. The same principles apply to RV owners. Clean, unobstructed panels help your system run more efficiently, especially when you are off-grid and depending solely on the sun.

Start by Checking the Condition of Your RV Solar Panels

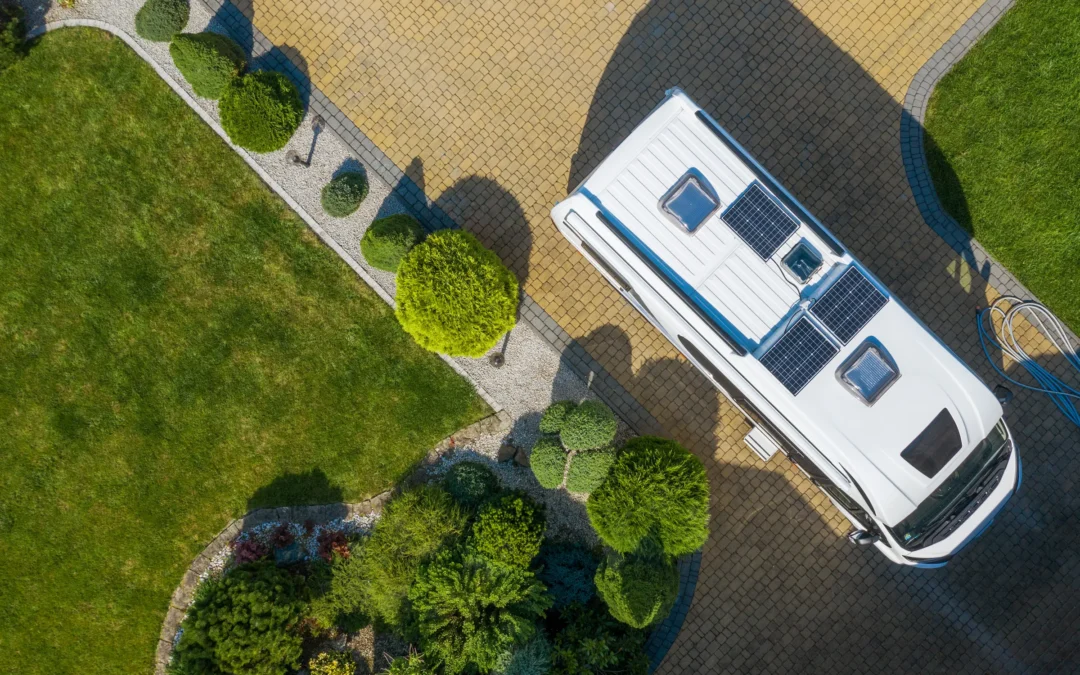
Your RV solar panels are the first thing to look at when preparing for boondocking. Dust, grime, or shading from rooftop accessories can reduce how much energy they produce. Cleaning the panels with a soft cloth and looking for any surface damage helps you make sure they are ready for the trip. If your panels are older or have been sitting through the off-season, it may be worth having them tested to confirm they are still producing at their rated output.

Some RV owners bring portable RV solar panels when they camp off-grid. These panels can be placed directly in the sun and moved throughout the day, which helps when your RV is parked under partial shade or when clouds roll in. Bringing portable panels is a simple way to supplement your main system without making permanent changes to your roof. If you feel like your system is barely keeping up, upgrading to a larger RV solar kit or adding more panels can make your next trip much more comfortable.

Enjoy the freedom that solar power brings to your RV experiences.

Evaluate Whether Your Batteries Can Support a Night Off-Grid

Even if your panels collect plenty of solar energy during the day, your boondocking experience depends heavily on how well your batteries store that power. Healthy batteries should charge fully during the day and hold that energy through the night. When batteries age or begin to fail, you may notice slow charging, faster voltage drop, or more difficulty keeping appliances running.

Many travelers prefer lithium batteries for boondocking because most manufacturer data and solar-storage guides show that lithium chemistry usually offers higher usable capacity and faster charging compared to traditional lead acid options. Lithium batteries are also typically rated for far more charge and discharge cycles over their lifetime. For example, Battle Born’s spec sheet for its 100Ah 12V LiFePO₄ battery lists an expected cycle life of 3,000 to 5,000 cycles, which gives RV owners significantly more usable energy over the long term than many lead acid batteries. Lead acid batteries still work well in many RV setups, but they provide less usable capacity and tend to wear out sooner if they are frequently cycled or regularly discharged too deeply.

If you are unsure whether your battery bank is strong enough for the way you camp, a quick capacity test can give you a clear answer before you head out.

Review Your Charge Controller Settings

Your charge controller plays an important role in regulating how solar energy flows into your batteries. If the settings are incorrect or if the controller is too small for your system, your batteries may charge slowly or inconsistently. Before your trip, it helps to check that your controller is programmed for your specific battery type. Lithium batteries, for example, require different charging parameters than lead acid batteries.

If you recently added more RV solar panels or upgraded to a larger RV solar kit, the charge controller must be able to handle the additional wattage. When a controller is undersized, it creates a bottleneck that limits how much power reaches your batteries. Watching the system’s readings over a few sunny days can help you spot issues early. Sudden voltage spikes, odd fluctuations, or unusually low charging numbers may signal a problem that needs attention.

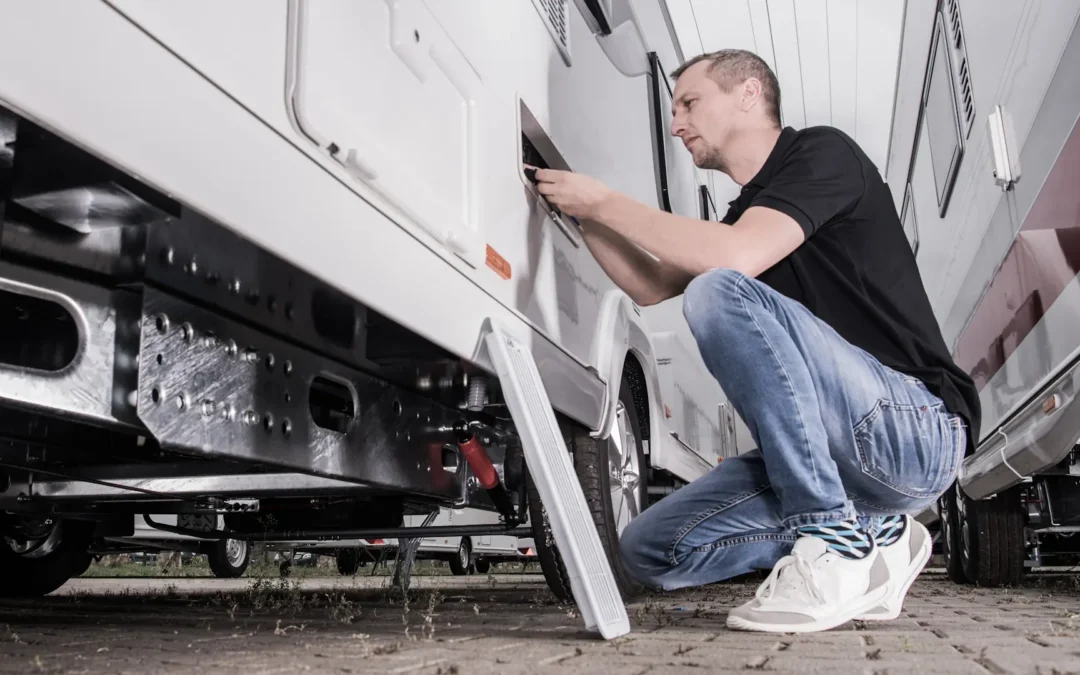
Check Wiring, Fuses, and Electrical Connections

RVs experience constant movement, and over time this can loosen electrical connections or cause wiring to wear down. Loose or corroded connections create voltage drops that reduce how much solar energy reaches your batteries. This is something you may not notice right away, but it can cause real problems once you are boondocking.

A quick inspection goes a long way. Look at the wires coming from your panels, the fuses between components, the connections on your charge controller, and the terminals on your battery bank. If anything looks discolored, frayed, or loose, it is better to handle the repair before your trip. Some RV owners upgrade to heavier gauge wire when expanding their system because thicker cables help reduce energy loss and improve overall efficiency.

Hi-Tech RV techs are experts in solar upgrades and repairs.

Test Your Energy Use Before the Trip

One of the best ways to prepare for boondocking is to simulate a night off-grid at home. Turn off shore power and use your RV normally. Run your lights, fans, fridge, chargers, and anything else you typically rely on. Then see how your batteries look the next morning and how long it takes for your panels to recharge them.

This test gives you a clear picture of your real energy needs. It also shows whether your system is producing enough power each day to keep up with your lifestyle. If your batteries drain faster than you expected or if your panels struggle to recharge them, you will know ahead of time instead of discovering the issue in the middle of a trip. Small adjustments like switching to LED lighting or using propane appliances can make a noticeable difference when you are off-grid.

Getting Your RV Ready for Your Next Trip

Preparing your RV solar system for boondocking helps you relax and enjoy your trip without worrying about power. When your panels, batteries, wiring, and controller are tuned and working together, your RV becomes a comfortable and reliable off-grid home. A little preparation makes remote camping feel simple, even when the nearest hookup is miles away.

For a solar inspection, repair, or upgrade before your next boondocking trip, visit Hi-Tech RV Service. We proudly serve RV owners from Pueblo to Boulder, Colorado.

RV Plumbing Basics: What Every RV Owner Should Know Before Hitting the Road

RV Plumbing Basics: What Every RV Owner Should Know Before Hitting the Road

Your RV plumbing system plays a big role in how comfortable and stress free your trips feel. It keeps water moving through your faucets, sends waste to the right place, and helps your shower, sinks, and toilet work the way you expect. Once you feel confident with the basics, you can travel with fewer surprises and enjoy your time on the road without worrying about leaks, clogs, or unpleasant smells.

RV plumbing works a little differently from a home system because everything is built for movement. Your rig travels over bumps, takes turns, shifts in temperature, and still has to keep water flowing. When you understand the main parts of the system and how they work together, it becomes much easier to care for it and spot small issues before they become major headaches.

Understanding the Structure of an RV Plumbing System

Most RVs follow the same general layout, even though each brand looks a little different behind the walls. A good starting point is your RV plumbing schematic, which shows where pipes run, how the RV pump connects to your water lines, and how your fresh water, grey water, and black water systems are arranged. Seeing everything on paper helps the entire system feel more familiar.

Your fresh water tank stores clean water for drinking, cooking, showering, and washing dishes. When you are not hooked up to city water, the pump pressurizes the lines and keeps water moving to your fixtures. The RV grey tank collects used water from sinks and the shower. The RV black tank handles everything from the toilet. Once you understand which tank does what and how water travels through the system, you can maintain it more confidently and troubleshoot more easily.

The RV Industry Association encourages RV owners to get to know their plumbing, electrical, and mechanical layouts so they can perform basic seasonal checks and prevent avoidable damage. Their consumer education page highlights how simple awareness can help reduce issues on the road. You can see their guidance here: https://www.rvia.org/consumer-safety.


Getting Comfortable With RV Plumbing Parts

RV plumbing includes several parts that work together to keep water flowing in and out. Most modern rigs use PEX tubing, which handles vibration and temperature changes well. You will also find fittings, valves, your water heater, low point drains, and the outlet that connects to your sewer hose when it is time to dump your tanks.

One part many RV owners overlook is the small filter attached to the RV pump. When it becomes clogged, water pressure can drop or stop completely. Knowing where this filter sits makes it easier to clean or replace it before it causes problems. Road vibration can also loosen fittings behind sinks and toilets. When you know where these fittings are and what they look like, it becomes much easier to tighten them and prevent slow leaks from developing during a trip.

The more familiar you are with the general layout and parts of your plumbing system, the more confidence you will have in spotting anything that looks out of place.

Enjoy the freedom that solar power brings to your RV experiences.

How Your Grey and Black Tanks Work

Your grey tank collects used water from your sinks and shower. Because it holds soap, food particles, and personal-care products, residue can build up over time. When this happens, you may notice odors inside the RV. Rinsing the tank regularly helps keep it cleaner and prevents smells from lingering during longer trips.

Your black tank is dedicated to toilet waste, and because everything stays inside until you dump it, this tank needs special attention. Using plenty of water when flushing helps keep the inside cleaner and prevents clogs. Regular rinsing also keeps the built-in tank sensors working more accurately, since buildup is one of the most common reasons sensors stop giving correct readings.

Once you understand how each tank handles different types of water, maintaining them becomes easier and far less overwhelming.

Why a Reliable Sewer Hose and Support Make a Difference

Dumping your tanks is a standard part of RV travel, and having a sturdy RV sewer hose support makes the process smoother. A support keeps the hose sloped properly toward the dump inlet, which helps waste move evenly instead of settling in low spots. When the hose is supported, it stays cleaner, lasts longer, and is less likely to leak or shift while in use.

Many RV owners find that using a hose support takes the stress out of dumping because it prevents unnecessary messes and makes the entire setup more stable.

How Your RV Pump Works and When to Use It

Your RV pump creates pressure whenever you are using water from your fresh tank. When everything is working well, the pump runs briefly and then stops once the lines are pressurized. If you hear it cycling when no one is using water, that usually means a fitting is loose or a small leak is somewhere in the system. Catching this early helps prevent water loss or long-term damage.

When you hook up to city water, you can turn the pump off because the external pressure handles the job. Even so, it is a good idea to test your pump every so often. You will rely on it any time you camp without hookups or travel between stops.

How to Spot Early Signs of Plumbing Trouble

Most plumbing issues start small. You might notice lower water pressure than usual, unusual smells near the bathroom, or slow draining sinks. Sometimes you will find moisture under a cabinet or hear the pump running longer than it should.

These early signs are worth paying attention to, because catching them quickly helps you avoid bigger issues later. A loose fitting, a dirty pump filter, or a partially clogged drain is much easier to handle before it turns into a full repair.

Hi-Tech RV techs are experts in solar upgrades and repairs.

Preparing Your Plumbing System Before Each Trip

A quick check before hitting the road can make a big difference. Running your faucets, testing the pump, and checking your water heater helps you confirm that your system is pressurizing correctly. It is also smart to look at your tanks to make sure they are sealed and draining the way they should.

If your RV has been in storage, take a minute to look over your valves and fittings. Rubber seals can dry out or shrink with changes in temperature. Tightening or replacing them before you travel helps prevent leaks once the system is pressurized again.

Keeping Your RV Plumbing in Good Shape on the Road

A well-maintained RV plumbing system keeps your travels smooth and your campsite more comfortable. When your lines, pump, tanks, and fittings work together the way they should, your entire RV experience improves. You spend less time fixing problems and more time enjoying the road.

For expert help with RV plumbing maintenance, repairs, inspections, or upgrades, visit HiTech RV Service. We proudly serve RV owners from Boulder to Pueblo, Colorado.

RV Exterior Repair in Denver | Restore Shine and Protection

RV Exterior Repair in Denver | Restore Shine and Protection

From Faded to Factory-Fresh: Expert Tips for RV Exterior Repair in Denver

A road-tested RV carries more than memories; it also tells the story of every journey and every RV repair that kept it moving forward. Sun fading, scratches, and small dents can dull its finish, while years of weather exposure can wear down protective coatings. Colorado travelers can rely on professional RV exterior repair in Denver to restore their vehicle’s appearance and protect it from the elements.

Whether you are fixing hail damage, repainting panels, or resealing the roof, expert repair can transform your rig from weathered to road-ready again.

Understanding RV Exterior Repair

Your RV’s exterior does more than make a first impression; it shields your home on wheels from the elements. Paint, siding, and seals work together to create a barrier against water, debris, and UV rays. Over time, exposure to Colorado’s high-altitude sun, snow, and mountain wind can cause oxidation, fading, or cracks in fiberglass and sealant.

Professional RV exterior restoration addresses both cosmetic and structural damage, ensuring your RV looks sharp and performs reliably. From fiberglass crack repair and siding replacement to full-body paint jobs, trained technicians use specialized materials designed to withstand long-term travel.

Common Exterior Problems RV Owners Face

Even well-maintained RVs are vulnerable to environmental wear. Here are some of the most common exterior issues and how professionals repair them:

1. Fading and Oxidation

Ultraviolet rays gradually break down clear coat and paint pigments, leaving surfaces chalky or dull. Professional refinishing removes oxidation, applies a new protective layer, and restores the original color and shine.

2. Fiberglass Cracks and Delamination

Fiberglass can separate or blister due to moisture and structural stress. Repair involves grinding the damaged area, applying fiberglass resin, and refinishing for a seamless match.

3. Dents, Scratches, and Collision Damage

Denver’s narrow streets and parking lots can be hard on large vehicles. RV body repair services remove dents, fill scratches, and repaint affected panels to factory standards.

Enjoy the freedom that solar power brings to your RV experiences.

4. Roof Seal and Water Damage

Leaks often begin at roof seams or around vents. Technicians can reseal joints, replace panels, and check interior surfaces for moisture intrusion to prevent rot or mold.

5. Exterior Inspections and Surface Protection

Regular exterior inspections are essential to keeping your RV in top condition. Technicians check for early signs of cracking, fading, or loose seals that could allow moisture to enter and cause damage. These inspections help identify minor issues before they become costly repairs, ensuring your RV’s finish stays smooth, protected, and ready for the road.

Exterior Materials Matter: Fiberglass, Aluminum, and Paint

Not all RV exteriors are built the same, and understanding the difference between materials helps you choose the right repair approach.

  • Fiberglass RVs: Lightweight and smooth, fiberglass is popular for its aerodynamic look but can crack or delaminate if water seeps behind panels. Repairs typically use fiberglass mat and resin, then sanding and gel coat finishing.

  • Aluminum Siding: Common on older or entry-level RVs, aluminum is durable but prone to dents. Technicians can often replace individual panels rather than entire sections.

  • Paint and Clear Coat Finishes: Newer RVs use automotive-grade paint systems. Professional body shops use color-matching technology and controlled spray environments for a flawless, factory-quality finish.

Understanding your RV’s construction materials helps you communicate more clearly with your service provider and ensures lasting results.

DIY vs. Professional Repair

Some small touch-ups, such as polishing trim or applying sealant, can be handled at home. However, more complex work that involves body panels, roof resealing, or full repainting requires professional expertise.

Professional technicians use proper materials, including industrial-grade sealants, primers, and paints designed for extreme weather conditions. They also rely on specialized paint booths to achieve accurate color matching and smooth, even finishes. Structural repairs to fiberglass and siding are completed with precision to maintain the RV’s strength and aerodynamics. In addition, professional coatings provide long-term protection, preventing UV and moisture damage far more effectively than consumer-grade products.

According to the RV Industry Association (RVIA), modern RVs incorporate more lightweight composite materials and specialized finishes than ever before, making certified repair expertise essential for safety and longevity.

Hi-Tech RV techs are experts in solar upgrades and repairs.

How to Choose the Right RV Exterior Repair Shop in Denver

Not every shop has the tools or training to restore RV exteriors correctly. When comparing providers, look for:

  • Certification: Technicians trained in fiberglass, paint, and structural repair.

  • Facilities: Clean, well-equipped shops with proper paint booths and ventilation.

  • Experience: Proven success with RVs of multiple sizes and materials.

  • Reputation: Positive reviews and transparent communication.

  • Estimates: Written pricing and clear timelines before work begins.

Choosing the right partner ensures your RV is repaired to factory standards and ready for future adventures.

Protecting Your Exterior After Repair

Once your RV looks brand new, protecting that finish should be part of your ongoing care routine. Regular washing helps remove dirt, bugs, and road debris that can damage paint over time. Applying a UV-protective wax or ceramic coating every few months adds an extra layer of defense against sun exposure and fading. It is also important to inspect seals and trim for cracks or peeling after long trips, since small openings can allow moisture to enter and cause damage.

When your RV is not in use, store it under cover or use a breathable protective cover to shield it from snow, rain, and harsh sunlight. Scheduling annual exterior inspections for paint condition, seams, and roof joints ensures that any minor issues are caught early. These simple steps extend the lifespan of your RV’s exterior and reduce the need for future repairs.

When to Schedule a Professional Inspection

If you notice bubbling, cracks, or dull spots in your RV’s finish, schedule an inspection before the damage spreads. Early attention can prevent costly delamination, leaks, or corrosion.

Professional RV body repair technicians can evaluate your RV’s condition, identify problem areas, and recommend the most cost-effective way to restore it. 

For expert service and lasting results, schedule your next inspection with HiTech RV Service. Their certified technicians specialize in exterior restoration and repair that keeps your RV looking factory-fresh and ready for every adventure.


Roadside to Rockies: Your Complete Guide to RV Repair Service in Denver

Roadside to Rockies: Your Complete Guide to RV Repair Service in Denver

RV Ownership is Changing and Repairs Are More Important Than Ever

Need RV repair in Denver? Learn how to handle common issues, find trusted mobile and in-shop service, and keep your RV road-ready with help from HiTech RV Service.

Every road trip comes with its share of surprises, but when those surprises involve leaks, electrical issues, or a slide that won’t close the journey can quickly shift from exciting to stressful. For travelers exploring Colorado’s open highways, knowing where to find a trusted RV repair service in Denver can make all the difference between a quick pit stop and a trip-ending delay.
This guide is for modern travelers and full-time road warriors who want to understand the most common RV repair issues, how to handle them, and where to turn for expert help in the Denver area.

Understanding the Difference Between Maintenance and Repair

Maintenance focuses on preventing problems before they occur, while RV repair deals with solving them after they appear. A good maintenance routine helps you keep systems in good condition, but even the most careful RV owners eventually face wear, damage, or unexpected breakdowns.
Recognizing the signs that something needs repair early can save time and prevent further damage. Whether you are dealing with an engine issue, water leak, or electrical malfunction, acting quickly often means a simpler and less expensive fix.

Enjoy the freedom that solar power brings to your RV experiences.

Common RV Repairs Travelers Encounter

Every RV owner eventually faces a repair situation, especially after long trips or exposure to harsh weather. Below are some of the most frequent issues that professional RV repair shops in Denver see throughout the year.

1. Roof Leaks and Water Damage

Colorado’s changing climate of sun, rain, and snow can cause seals and seams to deteriorate over time. Leaks often start small around vents or corners but can lead to costly water damage inside the RV. A professional RV roof repair helps stop leaks before they spread and protects the structure from rot or mold.

2. Electrical Problems

From blown fuses to malfunctioning inverters, electrical issues are among the most common service calls. If lights flicker, outlets stop working, or your generator fails to start, have a technician inspect wiring, connections, and batteries to pinpoint the cause.

3. Plumbing and Water System Failures

Leaks in pipes, fittings, or water heaters can cause more than inconvenience. They can lead to serious damage beneath flooring or cabinetry. Denver technicians can pressure test systems, replace fittings, and flush water lines to restore proper flow.

4. Slide-Out and Leveling System Malfunctions

Slide-outs and leveling jacks make RV life more comfortable but are prone to mechanical and hydraulic wear. Sticking slides, uneven leveling, or loud motors are all signs it is time for service.

5. Appliance and HVAC Repairs

Your refrigerator, furnace, air conditioner, and stove all need to operate smoothly for comfortable travel. When cooling or heating stops, or appliances will not ignite, professional diagnosis can quickly restore function.

Hi-Tech RV techs are experts in solar upgrades and repairs.

Emergency RV Repair: What to Do on the Road

Even with preparation, breakdowns happen. When they do, your priority should be safety and quick access to help. If your RV experiences trouble near Denver:

  1. Pull over safely and turn on hazard lights.

  2. Assess the issue without putting yourself in danger.

  3. Contact a mobile RV repair expert in Denver for on-site assistance.

  4. Document the problem with photos or notes for insurance or warranty purposes.

Mobile technicians can often handle flat tires, battery replacements, generator problems, and small plumbing or electrical issues right where you are parked. This saves towing costs and gets you back on the road faster.

RV Ownership is Changing and Repairs Are More Important Than Ever

RV ownership in the United States has reached record highs, with younger generations driving much of that growth. According to the RV Industry Association’s (RVIA), the median age of RV owners has dropped from 53 in 2021 to 49 in 2025, and nearly half of all owners now fall within the 35–54 age range. This shift reflects a growing number of working travelers and families using RVs more frequently and for longer distances.

As RV use expands, so does the need for reliable repair and inspection services. More miles mean more wear on key systems, from tires and brakes to appliances and roof seals. Whether you are traveling cross-country or camping in the Rockies, access to professional RV repair ensures that your RV remains safe, efficient, and ready for the next journey.

Why Professional RV Repair Matters

Some small fixes can be done yourself, but larger or safety-critical repairs should always be handled by certified professionals. Here is why:

  • Specialized tools and training: Certified RV technicians understand complex systems including propane, electrical, and mechanical components.

  • Accurate diagnostics: Proper testing prevents unnecessary part replacements and ensures the real issue is resolved.

  • Warranty protection: Many RV manufacturers require certified repairs to keep warranties valid.

Safety assurance: Repairs to brakes, propane lines, and electrical systems must meet strict safety standards to protect you and your passengers.

Professional RV repair gives owners peace of mind knowing that each component is inspected, tested, and serviced according to industry standards. Whether it involves structural work, electrical troubleshooting, or appliance repair, relying on experts ensures your RV performs safely and efficiently on every trip.

How to Choose the Right RV Repair Shop in Denver

Once you understand the importance of professional service, the next step is finding a shop you can trust. With so many options in the Denver area, choosing the right partner can make all the difference in both cost and reliability.

Here are a few qualities to look for when selecting a repair provider:

  • Certification and experience: Choose shops with certified RV technicians who are trained to service multiple brands and models.

  • Comprehensive services: A reliable shop handles mechanical, electrical, plumbing, and body repairs in one place for convenience and continuity.

  • Transparent estimates: Reputable businesses offer clear pricing, detailed work orders, and realistic timelines before starting the job.

  • Customer reviews: Positive, consistent feedback shows that other RV owners have had trustworthy experiences.

  • Local reputation: A well-established Denver shop with community recognition is more likely to stand behind its work.

Finding a repair shop that meets these standards ensures your RV gets the care it deserves. A skilled team can quickly diagnose issues, perform precise repairs, and help you get back on the road with confidence.

Preventing Future Repairs: Smart Habits for RV Owners

While this guide focuses on repairs, good habits can reduce how often you need them. Between professional visits, try incorporating these practices into your travel routine:

  • Inspect before each trip for tire pressure, lights, and visible seams.

  • Clean and reseal the roof annually to prevent leaks.

  • Exercise slide-outs and jacks to avoid stiffness.

  • Flush and sanitize plumbing systems to prevent buildup.

  • Operate the generator regularly to keep it reliable.

These habits not only help prevent major repairs but also extend the lifespan of your RV and improve travel safety.

Traveling Through Denver? Keep This Contact Handy

Whether you are full-timing, vacationing, or just passing through, having a reliable Denver RV repair shop in your contacts gives peace of mind. From minor fixes to complex diagnostics, HiTech RV Service helps keep your journey smooth from roadside to Rockies.

If you need expert RV repair service in Denver, schedule an appointment today with the team at HiTech RV Service. Skilled technicians handle roof resealing, appliance diagnostics, electrical troubleshooting, and more, all with quick turnaround and quality workmanship that travelers trust.


RV Solar Installation: Power Your Adventures with Clean Energy

RV Solar Installation: Power Your Adventures with Clean Energy

RV Solar Installation: Power Your Adventures with Clean Energy – Denver, CO

For Solar Power Installation in Denver, CO, RV Owners rely on High-Tech RV Service & Solar Repair Specialists (Hi-Tech).

If you spend any time traveling in your RV, you probably know how useful RV solar installation can be. Whether you are running the refrigerator, charging devices, or keeping the lights on after sunset, electricity is what makes an RV feel like home. Traditionally, most RVers have relied on generators or hookups at campgrounds, but there is a growing trend toward a more sustainable option.

Solar power gives RV owners greater independence than traditional power sources. With recent advancements in solar technology, installation has become more efficient and accessible, making it easier than ever to enjoy reliable energy on the road.

In this article, we will walk through everything you need to know about adding solar power to your RV, including how it works, the benefits, what to expect from RV solar panels cost, and when it might be time for an RV solar upgrade.

Why Consider RV Solar Installation?

The biggest reason to consider RV solar installation is freedom. When you install solar panels on your RV, you are no longer tied to RV parks or dependent on noisy generators. Instead, you can enjoy remote camping spots, national parks, and scenic boondocking locations without sacrificing comfort.

Beyond convenience, solar power also reduces long-term costs. While there is an upfront investment, panels generate free electricity as long as the sun is shining. Over time, this helps offset fuel costs for generators and campground hookup fees. And unlike generators, solar panels require little maintenance, meaning fewer headaches on the road.

Solar energy is also environmentally friendly. More and more RV owners want to reduce their carbon footprint, and solar power makes that possible without giving up the comforts of modern travel.

How RV Solar Panels Work

At its core, the system is fairly simple. Solar panels mounted on your RV’s roof capture sunlight and convert it into electricity. That electricity then flows through a charge controller, which regulates the power going to your RV’s batteries to prevent overcharging. Once stored in the batteries, the energy can be used directly for lights, appliances, and outlets.

If you want to run high-demand devices like air conditioners or microwaves, an inverter converts the stored power into the type of electricity those appliances need. This combination of panels, controller, batteries, and inverter is what makes a complete solar system.

The size of your system depends on your travel style. Full-time RVers who spend weeks off-grid will need more capacity than those who occasionally camp at parks with hookups.

Enjoy the freedom that solar power brings to your RV experiences.

Why an RV Solar Installation Makes Sense

Switching to solar power isn’t just about going green, it’s about gaining freedom and affordability. Studies show that as solar energy systems have become more accessible, households are widely embracing this clean power option, especially as traditional electricity costs rise. The U.S. Department of Energy reports that as solar adopts a larger role in energy systems, RV owners enjoy long-term savings, increased energy independence, and a contribution to a more resilient and sustainable future.

The Benefits of Installing Solar Panels on Your RV

When you install solar panels on your RV, you gain more than just electricity. You gain peace of mind and flexibility. Some of the top benefits include:

  • Quiet power generation: Unlike generators, solar panels run silently, allowing you to enjoy the sounds of nature.

  • Energy independence: Solar power gives you the ability to camp off-grid without relying on hookups or fuel.

  • Low maintenance: Once installed, panels require minimal upkeep beyond occasional cleaning.

  • Extended battery life: By keeping batteries consistently charged, solar reduces wear and extends their lifespan.

  • Cost savings: Lower fuel costs and fewer campground fees add up over time.

These advantages make solar an attractive upgrade for both part-time and full-time RV owners.

RV Solar Panels Cost: What to Expect

One of the most common questions is how much RV solar panels cost. The answer depends on system size, equipment quality, and installation complexity. 

On average, a basic RV solar setup with a few panels and a charge controller can start around $600 to $1,000, while larger, more advanced systems with inverters and lithium batteries can range from $3,000 to $10,000 or more. Professional installation adds to the investment but ensures the system is set up safely and efficiently. Since RV electrical systems are more complex than home installations, working with trained technicians often prevents costly mistakes. 

While the upfront cost can seem significant, solar power pays for itself over time. By reducing generator use, fuel expenses, and campground fees, many RV owners find that solar panels are a smart long-term investment. Get solar panel installation rates and an estimate.

When to Consider an RV Solar Upgrade

If you already have a small solar system, you might wonder when it makes sense to upgrade. An RV solar upgrade becomes worthwhile when your energy needs increase or your system can no longer keep up with your lifestyle.

For example, if you recently added new appliances, started traveling more often, or spent longer periods off-grid, your existing panels might not provide enough power. Upgrading allows you to add more panels, increase battery capacity, or improve efficiency with a better inverter or charge controller.

Technology is also improving quickly. If your solar setup is several years old, newer panels may deliver more power in the same amount of space, making it easier to expand your system without taking up additional roof area.

Hi-Tech RV techs are experts in solar upgrades and repairs.

Installation: DIY or Professional?

Many RV owners wonder if they should install solar panels themselves or hire a professional. While DIY kits are available and can work for smaller systems, professional installation provides peace of mind. RV electrical systems are not always straightforward, and mistakes can be costly or even dangerous.

Professional technicians know how to safely mount panels without damaging the roof, properly route wiring, and integrate the system with your existing batteries and appliances. They can also help design a system tailored to your specific needs, ensuring you get the most value for your investment.

At Hi-Tech RV Service, we specialize in RV solar installation for all types of motorhomes and trailers. Our team ensures your system is safe, efficient, and built to handle your travel lifestyle.


RV Solar and Seasonal Maintenance

Even though solar panels require little attention, incorporating them into your RV preventive maintenance  schedule is a smart idea. Regularly check for debris or dirt on the panels, inspect wiring connections, and make sure the charge controller and inverter are functioning properly.

In colder climates, snow buildup can block sunlight, while in hot climates, dust and sand may reduce efficiency. A quick visual inspection before and after long trips helps keep everything running smoothly.